
When a pipe bursts, quick action is crucial to minimize damage. Start by shutting off the main water supply to halt further flooding. Next, pinpoint the location of the burst pipe and contain the water spread. You’ll need to remove any standing water and dry out affected areas to prevent mold. But there are specific steps to ensure thorough cleanup and safety. Let’s explore those next.
Key Takeaways
- Immediately shut off the main water supply to prevent further flooding and damage.
- Use absorbent materials like towels or mops to soak up excess water quickly.
- Inspect for the source of the leak and document damage with photos for insurance claims.
- Clean and disinfect affected surfaces to eliminate contaminants and prevent mold growth.
- Assess pipe damage to determine if repair or replacement is necessary for a long-term solution.
Assessing the Situation
When a pipe bursts, how do you determine the best course of action? First, evaluate the extent of the damage. Check the surrounding areas for water pooling or structural issues. Quick identification of the problem is essential for effective emergency preparedness.
Next, review your plumbing maintenance history. Have you noticed any leaks or signs of wear before? Understanding your system helps you make informed decisions.
If the damage seems extensive, document it with photos for insurance purposes. Prioritize safety—avoid electrical hazards and ensure your personal belongings are protected.
Shutting Off the Water Supply
Before tackling the cleanup, you must shut off the water supply to prevent further damage.
Locate your main shut-off valve, usually found in basements or near your water meter.
Turn it clockwise until it’s fully closed.
This step is critical and follows emergency protocols to safeguard your property.
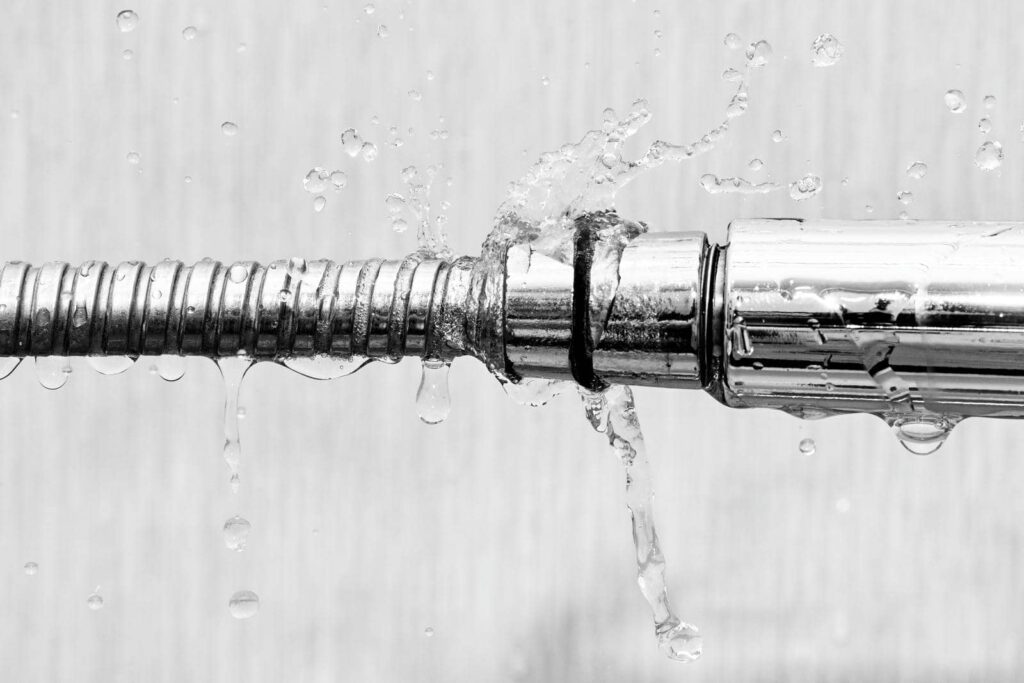
Identifying the Burst Pipe Location
To locate the burst pipe, start with a thorough visual inspection of visible pipes and surrounding areas for signs of water damage or leaks.
You can also listen carefully for any hissing or dripping sounds that indicate escaping water.
Finally, check the water pressure; a sudden drop might signal a rupture in the system.
Visual Inspection Techniques
Identifying the location of a burst pipe requires keen observation and systematic inspection of the affected area.
Start by looking for visual cues such as water stains, mold growth, or damp spots that can indicate the source of the leak. Use inspection tools like a flashlight to illuminate dark spaces and a moisture meter to detect hidden moisture levels.
Pay attention to areas around joints, fittings, and bends in the pipes, as these are common failure points. If you spot any unusual discoloration or warping in walls and ceilings, take note; these often signal a burst pipe nearby.
Listening for Leaks
While visual inspection is an essential first step, listening for leaks can provide additional insights into the location of a burst pipe.
Employing sound monitoring techniques, you can identify the distinct noises associated with leaks, such as hissing or dripping. Use a stethoscope or a simple listening device to hone in on these sounds, focusing on areas where you suspect a leak might be present.
Pay attention to changes in noise levels, as these can indicate the severity of the leak. By incorporating effective leak detection strategies, you’ll save time and enhance your ability to locate the problem quickly.
Check Water Pressure
Checking water pressure is essential for pinpointing the location of a burst pipe.
Start by attaching a pressure gauge to a faucet or hose bib. This tool gives you a clear reading of your home’s water pressure. If the pressure is considerably higher than normal—typically above 80 psi—there might be a problem with your pressure regulator, which can lead to burst pipes.
Conversely, if the pressure is low, it could indicate a leak somewhere in the system. By monitoring these readings, you can narrow down the area where the burst may have occurred.
Addressing water pressure issues promptly prevents further damage and fosters a sense of community responsibility in maintaining your home.
Containing the Water Damage
To contain water damage from a burst pipe, you first need to identify the leak source.
Once you’ve pinpointed it, shut off the water supply immediately to prevent further flooding.
After that, use absorbent materials to soak up any excess water and minimize damage to your property.
Identify the Leak Source
Identifying the leak source is essential for containing water damage effectively. Start by conducting thorough leak detection throughout your property.
Look for signs like damp spots, water stains, or mold growth, as these can indicate where the pipe has burst. Don’t forget to check hidden areas, such as behind walls or under floors.
Use your plumbing maintenance knowledge to pinpoint potential weak spots in your system. If you can’t find the leak quickly, consider using specialized equipment, like moisture meters or thermal imaging cameras, to aid your search.
The sooner you locate the leak, the faster you can take action to minimize damage and restore your home. Remember, quick identification is key to successful cleanup.
Shut Off Water Supply
When a pipe bursts, shutting off the water supply is crucial to contain the damage.
Quickly locate your main water shut-off valve, usually found in basements, crawl spaces, or near your water meter. Turning this valve clockwise will halt the flow, preventing further flooding.
This immediate action is one of the most effective emergency measures you can take in a crisis like this. After securing the water supply, assess the situation and begin planning for cleanup.
Regularly performing preventative maintenance on your plumbing system can help you avoid such emergencies in the future.
Use Absorbent Materials
After shutting off the water supply, the next step is to contain the damage by using absorbent materials.
Grab absorbent towels immediately to soak up standing water. Place these towels in areas where water accumulation is most significant. If you have any water barriers available, position them strategically to prevent further spread.
These barriers can help redirect the flow of water, minimizing damage to your home. Remember to frequently replace the soaked towels with dry ones until you’ve thoroughly absorbed the moisture.
This method protects your belongings and helps reduce mold growth. By acting quickly and using absorbent materials effectively, you’ll create a safer environment for yourself and your loved ones.
Removing Standing Water
To effectively tackle standing water caused by a burst pipe, start by gathering essential tools like a wet/dry vacuum or a submersible pump. These tools are crucial for efficient standing water removal.
Position the vacuum or pump in the deepest area of the affected space to maximize effective drainage. If you have a submersible pump, connect it to a hose that directs water away from your home. For wet/dry vacuums, repeatedly empty the collection tank to maintain performance.
Make sure you wear protective gear, as standing water can pose health risks. Once the majority of the water is removed, check for any remaining pockets of water.
Prompt actions will help prevent further damage and create a safer environment for everyone involved.
Drying Out Affected Areas
Once you’ve removed standing water, it’s vital to dry out the affected areas quickly to prevent mold growth and structural damage.
Start by employing effective ventilation techniques, such as opening windows and using fans to circulate air. This helps to reduce humidity levels, making it easier to manage moisture control.
Dehumidifiers can also be instrumental in extracting excess moisture from the air. Focus on areas with porous materials, like carpets and drywall, as these can retain moisture.
You’ll want to monitor humidity levels regularly to ensure they remain low.
Cleaning and Disinfecting Surfaces
While drying out the affected areas is crucial, cleaning and disinfecting surfaces are equally important to eliminate contaminants and prevent health hazards.
Start by using effective cleaning techniques, such as scrubbing surfaces with soap and water to remove dirt and debris. Pay special attention to porous materials, which can retain moisture and contaminants.
Next, apply appropriate disinfecting methods, like using a diluted bleach solution or a commercial disinfectant, to kill bacteria and viruses. Ensure you follow the manufacturer’s instructions for proper dilution and contact time.
Don’t forget to ventilate the area while you work.
Finally, protect yourself with gloves and a mask, fostering a safe environment for both yourself and others in your space.
Inspecting for Mold Growth
After cleaning and disinfecting surfaces, it’s important to inspect for mold growth, which can develop rapidly in damp environments.
Here’s how to conduct an effective mold inspection for mold prevention:
Check Humidity Levels: Use a hygrometer to ensure humidity stays below 60%.
Examine Visible Surfaces: Look for discoloration or black spots on walls, ceilings, and floors.
Inspect Hidden Areas: Check behind appliances and inside cabinets where moisture may accumulate.
Monitor Odors: A musty smell can indicate mold presence, even if it’s not visible.
Prompt action can help prevent mold from spreading, assuring your space remains safe and healthy.
Regular inspections will foster a sense of belonging in your environment, protecting both you and your loved ones.
Repairing or Replacing the Burst Pipe
When a pipe bursts, addressing the issue promptly is crucial to prevent further damage and costly repairs.
First, assess whether you can repair or need to replace the damaged section. For minor leaks, using appropriate plumbing materials like epoxy or pipe sealant might suffice. However, for more severe damage, a complete replacement may be necessary.
If you opt for replacement, ensure you use high-quality piping materials to assure longevity. This may involve professional pipe installation, especially if you’re unfamiliar with plumbing.
Frequently Asked Questions
What Are the Signs of a Burst Pipe?
You’ll notice signs of a burst pipe, like foul odors from stagnant water and visible water stains on walls or ceilings. If you see these, it’s essential to act quickly to prevent further damage.
How Do I Prevent Future Pipe Bursts?
To prevent future pipe bursts, insulate your pipes, especially in colder areas. Regular seasonal maintenance, like checking for leaks and ensuring proper drainage, helps you maintain a reliable plumbing system and fosters a sense of community care.
Can I Claim Insurance for Water Damage?
Yes, you can claim insurance for water damage, provided it’s covered under your policy. Review your insurance coverage details, document the damage, and file your claim promptly to ensure a smoother process.
Is Professional Help Always Necessary for Cleanup?
Professional help isn’t always necessary for cleanup; sometimes you can tackle DIY cleanup effectively. However, in severe cases, emergency response teams ensure thorough safety and restoration, making them invaluable when water damage overwhelms your efforts.
What Items Can Be Salvaged After Water Damage?
You can often salvage items like metal appliances, glassware, and certain furniture, depending on the extent of water damage. Evaluate each piece carefully to determine its condition and potential for restoration.
Wrap-Up
Addressing a burst pipe promptly can save you from a world of trouble, much like a knight in shining armor saving the day. By shutting off the water supply, containing the damage, and thoroughly drying and disinfecting the area, you minimize risks like mold growth. Don’t forget to document the damage for insurance purposes and make sure the pipe is repaired or replaced to prevent future incidents. Stay vigilant, and you’ll keep your home safe and dry.