
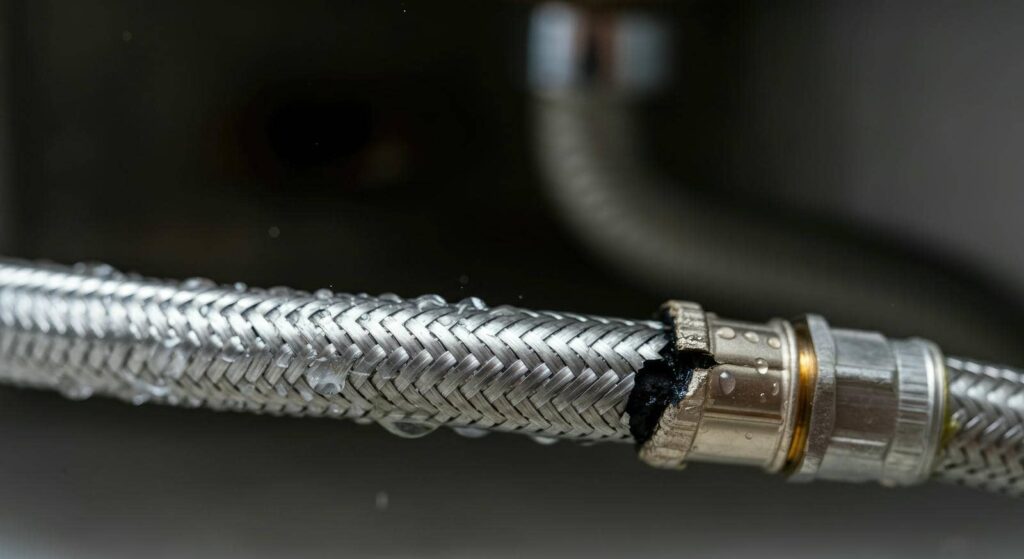
When a burst pipe occurs, you need to act quickly to minimize damage. Start by evaluating the area and shutting off the water supply. It’s vital to document the pipe cleanup situation for insurance claims. Next, remove standing water and dry out the space thoroughly. Don’t overlook sanitizing surfaces to prevent mold growth. If the damage is extensive, consider professional help. Understanding these steps can make a significant difference in your cleanup efforts. What comes next might surprise you.
Key Takeaways
- Assess the damage immediately and document findings for insurance purposes to expedite claims.
- Shut off the water supply at the main valve to stop further flooding.
- Remove excess water promptly using a wet vacuum and mop techniques.
- Dry out remaining moisture with dehumidifiers and ensure proper air circulation.
- Wear protective gear and ensure the area is well-ventilated to prevent health risks.
Assess the Damage Immediately
When a burst pipe occurs, evaluating the damage immediately is vital to mitigating further issues.
Start with a thorough visual inspection of the affected area. Look for standing water, damp spots, or any signs of structural damage. Take note of affected materials, including walls, flooring, and furniture, as these will influence your next steps.
Document your findings for insurance purposes; a detailed damage assessment can expedite claims. If you spot any electrical hazards, prioritize safety and avoid contact.
It’s essential to work efficiently but carefully to prevent mold growth and further deterioration. Bringing in professionals at this stage can ensure that you handle the situation correctly, providing peace of mind as you navigate the cleanup process together.
Shut Off the Water Supply
To prevent further damage from a burst pipe, you need to locate the main shutoff valve and turn it off immediately.
This action stops the flow of water into your home, minimizing the impact of the leak.
Additionally, make sure to turn off any affected appliances to avoid electrical hazards and further complications.
Locate Main Shutoff Valve
Locating the main shutoff valve is essential for effectively managing a burst pipe situation. This valve controls the water pressure throughout your home, and knowing its location can save you from extensive damage.
Typically, you’ll find the main valve near the perimeter of your home, often in the basement, crawl space, or close to the water meter. Once you identify it, make sure you can access it quickly in emergencies.
Familiarize yourself with its operation; most valves turn clockwise to shut off. If you’re unsure, consider marking it with a label for easy reference.
Turn Off Appliances
After you’ve located the main shutoff valve, the next step is to turn off the water supply to your appliances to prevent further damage.
Start by unplugging any electrical appliances that might be in the affected area. This step is essential for the safety of your devices and to prevent electrical hazards that can arise from water exposure.
Check each appliance’s individual shutoff valves, if available, and turn them off. If you’re unsure about any appliance, consult the user manual for specific instructions.
Remember, taking these precautions protects your home and fosters a sense of community responsibility by ensuring everyone stays safe.
Document the Affected Areas
As you begin the cleanup process following a burst pipe, accurately documenting the affected areas is essential for effective remediation and insurance claims.
Start by conducting a thorough damage assessment. Use a notepad to list all impacted locations, including walls, flooring, and personal belongings.
Next, take photo documentation of each area, ensuring you capture the extent of the damage from multiple angles. This visual evidence will support your claims and help professionals understand the situation better.
Be meticulous in your documentation, noting specific details like the type of materials affected and any visible mold growth.
Detailed records facilitate a smoother claims process and provide vital information for future repairs, ensuring your home returns to its pre-damage condition.
Remove Excess Water Promptly
After a burst pipe, addressing excess water quickly is vital to prevent further damage.
You should use a wet vacuum to remove standing water, followed by mopping and towels to soak up residual moisture.
Don’t forget to check for hidden pockets of water that could lead to mold growth or structural issues.
Use a Wet Vacuum
Using a wet vacuum is one of the most effective ways to remove excess water quickly after a burst pipe incident.
Wet vacuums offer significant benefits, including powerful suction that can handle large volumes of water and the ability to access tight spaces.
To maximize efficiency, start by clearing the area of furniture and debris.
Use a wet vacuum tip: verify the vacuum is set to the correct mode for water extraction.
Move methodically, vacuuming in overlapping strokes to ensure thorough removal.
After you’ve extracted the majority of water, check for hidden pockets of moisture.
Mop and Towels
To effectively remove excess water from your space after a burst pipe, mops and towels serve as essential tools.
First, employ efficient mop techniques, such as the figure-eight motion, to effectively soak up larger pools of water. Choose a microfiber mop for its high absorbency and quick-drying capabilities.
For smaller spills, select the right towel types—preferably cotton or terry cloth—as they can absorb moisture rapidly. Keep a variety of towel sizes on hand to tackle different areas effectively.
As you work, regularly wring out the mop or replace towels to maintain efficiency.
Prompt action will speed up the cleanup process and help prevent secondary damage, ensuring your space feels welcoming and safe again.
Check for Hidden Pockets
While you focus on visible water removal, it’s crucial to check for hidden pockets where moisture may linger.
Hidden damage can occur in areas like behind walls, under floors, or in insulation. Use a moisture assessment tool to identify damp spots that aren’t immediately visible.
Inspect corners, cabinets, and around fixtures, as these areas often trap water. If you notice any signs of moisture, act quickly to remove excess water and dry the area thoroughly.
Remember, even small amounts of moisture can lead to mold growth and structural damage if left untreated.
Dry Out Remaining Moisture
After addressing visible water damage, it’s crucial to dry out any remaining moisture to prevent mold growth and structural issues.
Start by using moisture meters to accurately gauge dampness in walls, floors, and hidden areas. This step ensures you target the most affected spots.
Next, employ effective drying techniques such as using dehumidifiers, fans, or even heat sources to promote evaporation.
Ensure proper air circulation by opening windows and doors, allowing fresh air to assist in the drying process.
Monitor the moisture levels regularly until they reach a safe threshold.
Sanitize and Disinfect the Area
Once you’ve successfully dried out the affected areas, the next step is to sanitize and disinfect the space to eliminate any lingering bacteria or contaminants.
Start by selecting appropriate disinfectant products that are effective against waterborne pathogens. Common options include bleach solutions or EPA-registered disinfectants.
Utilize sanitization techniques like spray-and-wipe or fogging, depending on the area’s size. For surfaces, scrub with a cloth soaked in the disinfectant, allowing it to sit for the recommended contact time.
Don’t forget to tackle hidden spots, as bacteria can linger in crevices. Once you’ve completed this process, ventilate the area to help dissipate any chemical odors.
This thorough approach ensures your space is safe and healthy for everyone.
Contact a Professional Restoration Service
If you’re facing extensive damage from a burst pipe, contacting a professional restoration service is crucial to efficiently address the situation.
These experts provide invaluable professional advice tailored to your specific needs. Restoration services are equipped with specialized tools and techniques to quickly assess the damage, remove standing water, and prevent mold growth.
They understand the intricacies of water damage and can restore your home to its original condition. Additionally, their experience ensures compliance with local regulations and safety standards.
Frequently Asked Questions
How Can I Identify the Source of a Burst Pipe?
To identify the source of a burst pipe, conduct a thorough pipe inspection and utilize leak detection techniques. Look for wet spots, listen for hissing sounds, and check your water bill for unusual spikes.
What Safety Precautions Should I Take During Cleanup?
During cleanup, always wear safety gear like gloves and boots. Since many water damage incidents involve electrical hazards, make certain you turn off the power before starting. Stay cautious and prioritize your safety throughout the process.
Can I Use Fans to Speed up Drying?
Yes, you can use fans to speed up drying. Proper fan placement enhances air circulation, accelerating drying techniques. Position fans to create cross-ventilation, ensuring moisture evaporates quickly, reducing the risk of mold and further damage.
How Long Does It Take for Mold to Develop?
“An ounce of prevention is worth a pound of cure.” Mold growth can begin within 24 to 48 hours after water exposure. Implementing effective prevention methods, like proper ventilation and moisture control, is essential for safety.
Will My Insurance Cover Burst Pipe Damage?
Your insurance may cover burst pipe damage, depending on your insurance policies. Review your coverage details and initiate the claim process promptly to maximize your chances of receiving compensation for the damage incurred.
Final Thoughts
Acting quickly after a burst pipe can save you time and money. Did you know that water damage can lead to mold growth within just 24 to 48 hours? By following these cleanup tips—assessing the damage, shutting off the water, documenting the area, removing excess water, drying out moisture, and sanitizing—you’ll greatly reduce the risk of further issues. If the damage is extensive, don’t hesitate to contact a professional restoration service for expert help.